How to use
|
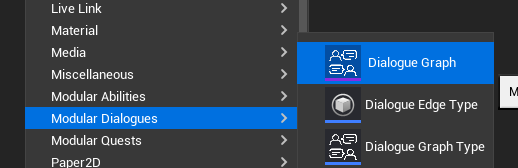
Create a Dialogue Graph
You can create a new dialogue graph in the "Modular Dialogues" section of the content browser. |
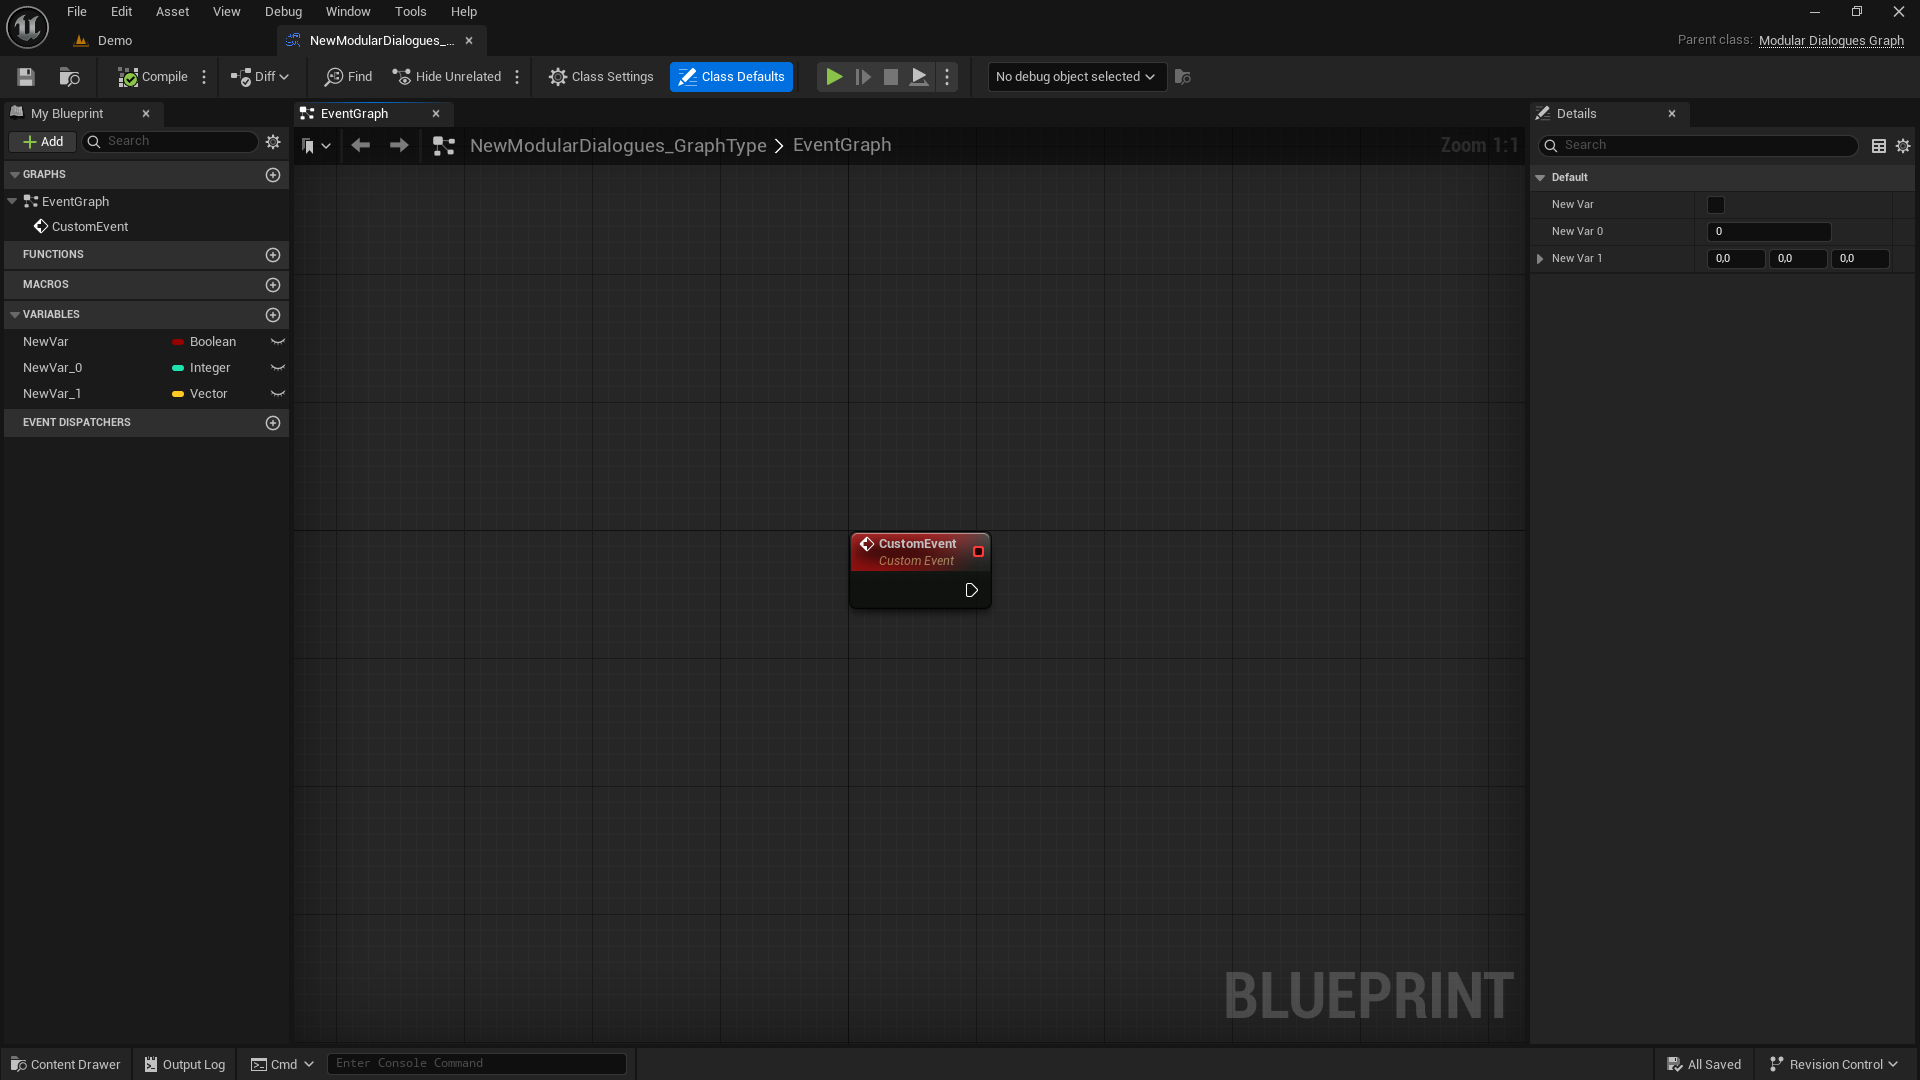
Select your graph type
Default graph type and all your own dialogue graph types are displayed here. |
.png)
|
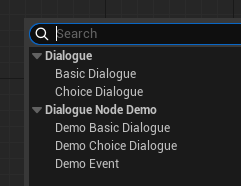
Build your dialogue
Using your own nodes or the basic ones, create the dialogue of your dreams. |
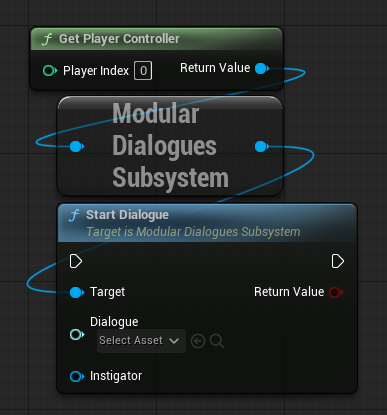
Start your dialogue
E.g. You can call it upon interaction with an NPC. |
|
Switch to next sentence
To switch to the next sentence, you must call "Next Dialogue". Be aware that providing a dialogue is optional. However, if you don't, the first active dialogue found will be used.
|
Switch to next sentence with parameters
This works similarly to "Next Dialogue" but you also have the option to pass parameters as an instanced struct. 💡Learn more about instanced structs |
.png)
.png)
.png)
|
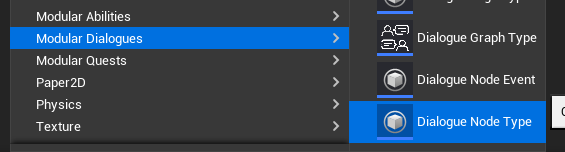
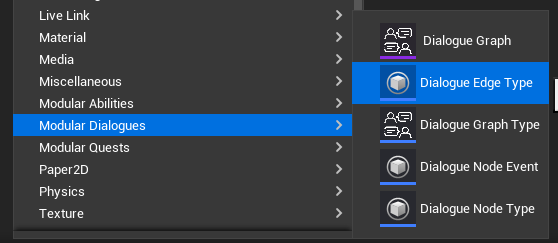
Dialogue Node Type
Create your own dialogue node type to have nodes with new functionalities. |
Dialogue Edge Type
You can also create your own dialogue edge type to manage how they are "validated". |
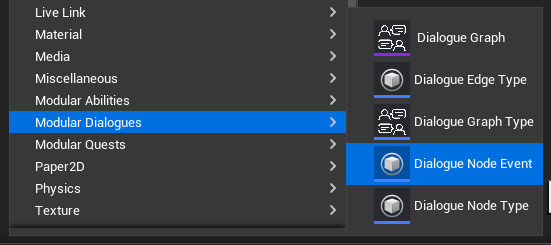
Dialogue Node Event
A native event system is available, you can create your own dialogue node event that will be triggered once the sentence they are assigned to is reached. |

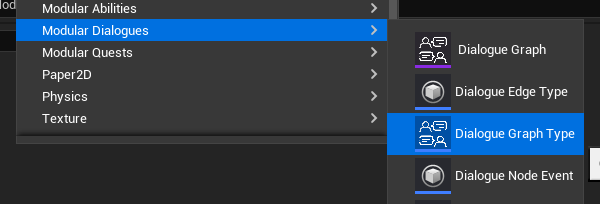
Dialogue Graph Type
|
Create a Dialogue Graph Type
You can create a new dialogue graph type in the "Modular Dialogues" section of the content browser. |
Do what you need
|
.png)
Dialogue Node Type
1 - Core
|
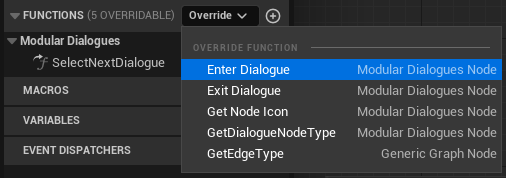
Create a Dialogue Node Type
You can create a new dialogue node type in the "Modular Dialogues" section of the content browser. |
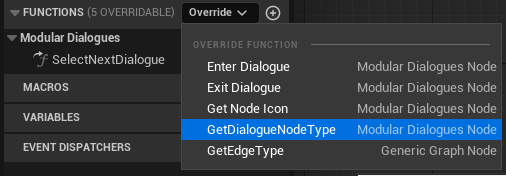
Override Select Next Dialogue
The main function you need to handle is "Select Next Dialogue". This is the one that will be responsible for choosing the next sentence. |
.png)
Make your own logic
.png)
Here is the default behavior of "Select Next Dialogue". It will loop through each Edge, check if its condition is true, and if so, it returns the Node associated with that Edge. In most cases, this is what you'll need since everything will be handled within the Edge. However, you can have a need for a different logic here.
💡As a reminder, the default values of the variables you create in a Node can be modified directly from the graph.
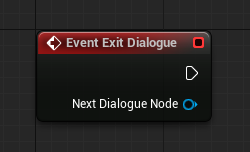
2 - Enter & Exit
|
Override Enter Dialogue
|
Override Exit Dialogue
|
.png)
.png)
3 - Node configuration
|
Dialogue Node Type
|
Get Node Icon
You can change the node's icon by overriding this function. You can either simply select a texture or create a logic to choose an icon based on specific parameters. |
Get Edge Type
You can override this function to choose which Edge type you want this node to have. For example, in the demo, the choice node uses a specific Edge class, which allows for multiple different Edge configurations within the same graph! |
.png)

.png)
.png)
.png)
Dialogue Edge Type
1 - Core
|
Create a Dialogue Edge Type
You can create a new dialogue edge type in the "Modular Dialogues" section of the content browser. |
Override Handle Condition
The main function you need to handle is "Handle Condition". This is the one that is natively called by the node. |
.png)
Make your own logic
.png)
E.g. Here is the example used in the demo. We retrieve the data sent in the instanced struct and check if it matches what was selected in the graph.
💡As a reminder, the default values of the variables you create in an Edge can be modified directly from the graph.
2 - Edge configuration
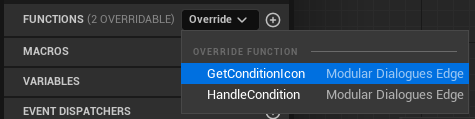
Get Condition Icon
|
You can change the node's icon by overriding this function. You can either simply select a texture or create a logic to choose an icon based on specific parameters. |
.png) |
Dialogue Node Event
1 - Core
|
Create a Dialogue Node Event
You can create a new dialogue node event in the "Modular Dialogues" section of the content browser. |
Event Trigger
The Event Trigger is called by the node when it becomes active (just before the Enter call). |
.png)
.png)
2 - Display Name configuration
Get Event Display Name
 |
.png) |
.png) |
You can override the "Get Event Display Name" function to change what will be displayed (in orange-yellow) on the node. By default, only the event's name will be shown.
Instanced Structs
|
Create a structure
First, create a struct and add the parameter variables you want. |
Make Instanced Struct To convert your custom struct into an instanced struct, you must use the "Make Instanced Struct" node. |
Get Instanced Struct Value To retrieve your parameters from the instanced struct, you must use the "Get Instanced Struct Value" node along with a "Break YourStruct". |
.png)
.png)
.png)

 Our Marketplace